Translate

Showing posts with label Switching layout. Show all posts

Friday, January 17, 2020

Building a switching layout (Part 9) The Yard addition

My switching layout is operational for two years now. I haven't shown it at many shows since, due to time issues. Last autumn I thought that it would be time to attend a couple of shows in France and Germany for the upcoming month. So my first appearance was at the RAMMA Show in Sedan in mid-october 2019. Although I enjoyed operating the layout I found that something was missing to my enjoyment. A neighboring layout almost had the same size as mine, but he had continuous running through an oval with a narrow yard, connected to his layout. My layout only has a short cassette which serves as a drill track for a locomotive and only one (!) car. In fact I only switch the same cars over and over again, except when the big 0-5-0 comes and swaps some cars.


Shortly after the Sedan Show, I headed to my local lumber yard and bought me the required plywood sheets for my new extension of the layout. The days after the show I already made plans how the extension would look like. With measurements on hand, I ordered the sheets cut up, so that I only had to assemble the different segments.


The layout consists of two 90cm (approx. 3 feet) segments, so I build the boxes for the yard to match their size. As I adopted the 90 cm length as a standard for my future show layouts, the yard and future oval will always match whatever layout I would use.


The yard will have a total length of three segments. These will not be needed with my actual switching layout, so I concentrated on only two segments. To save space I used a PECO medium radius 3-way turnout on each side of the yard.


This minimal configuration gives me plenty of storage space to turnover my rolling stock during operations.


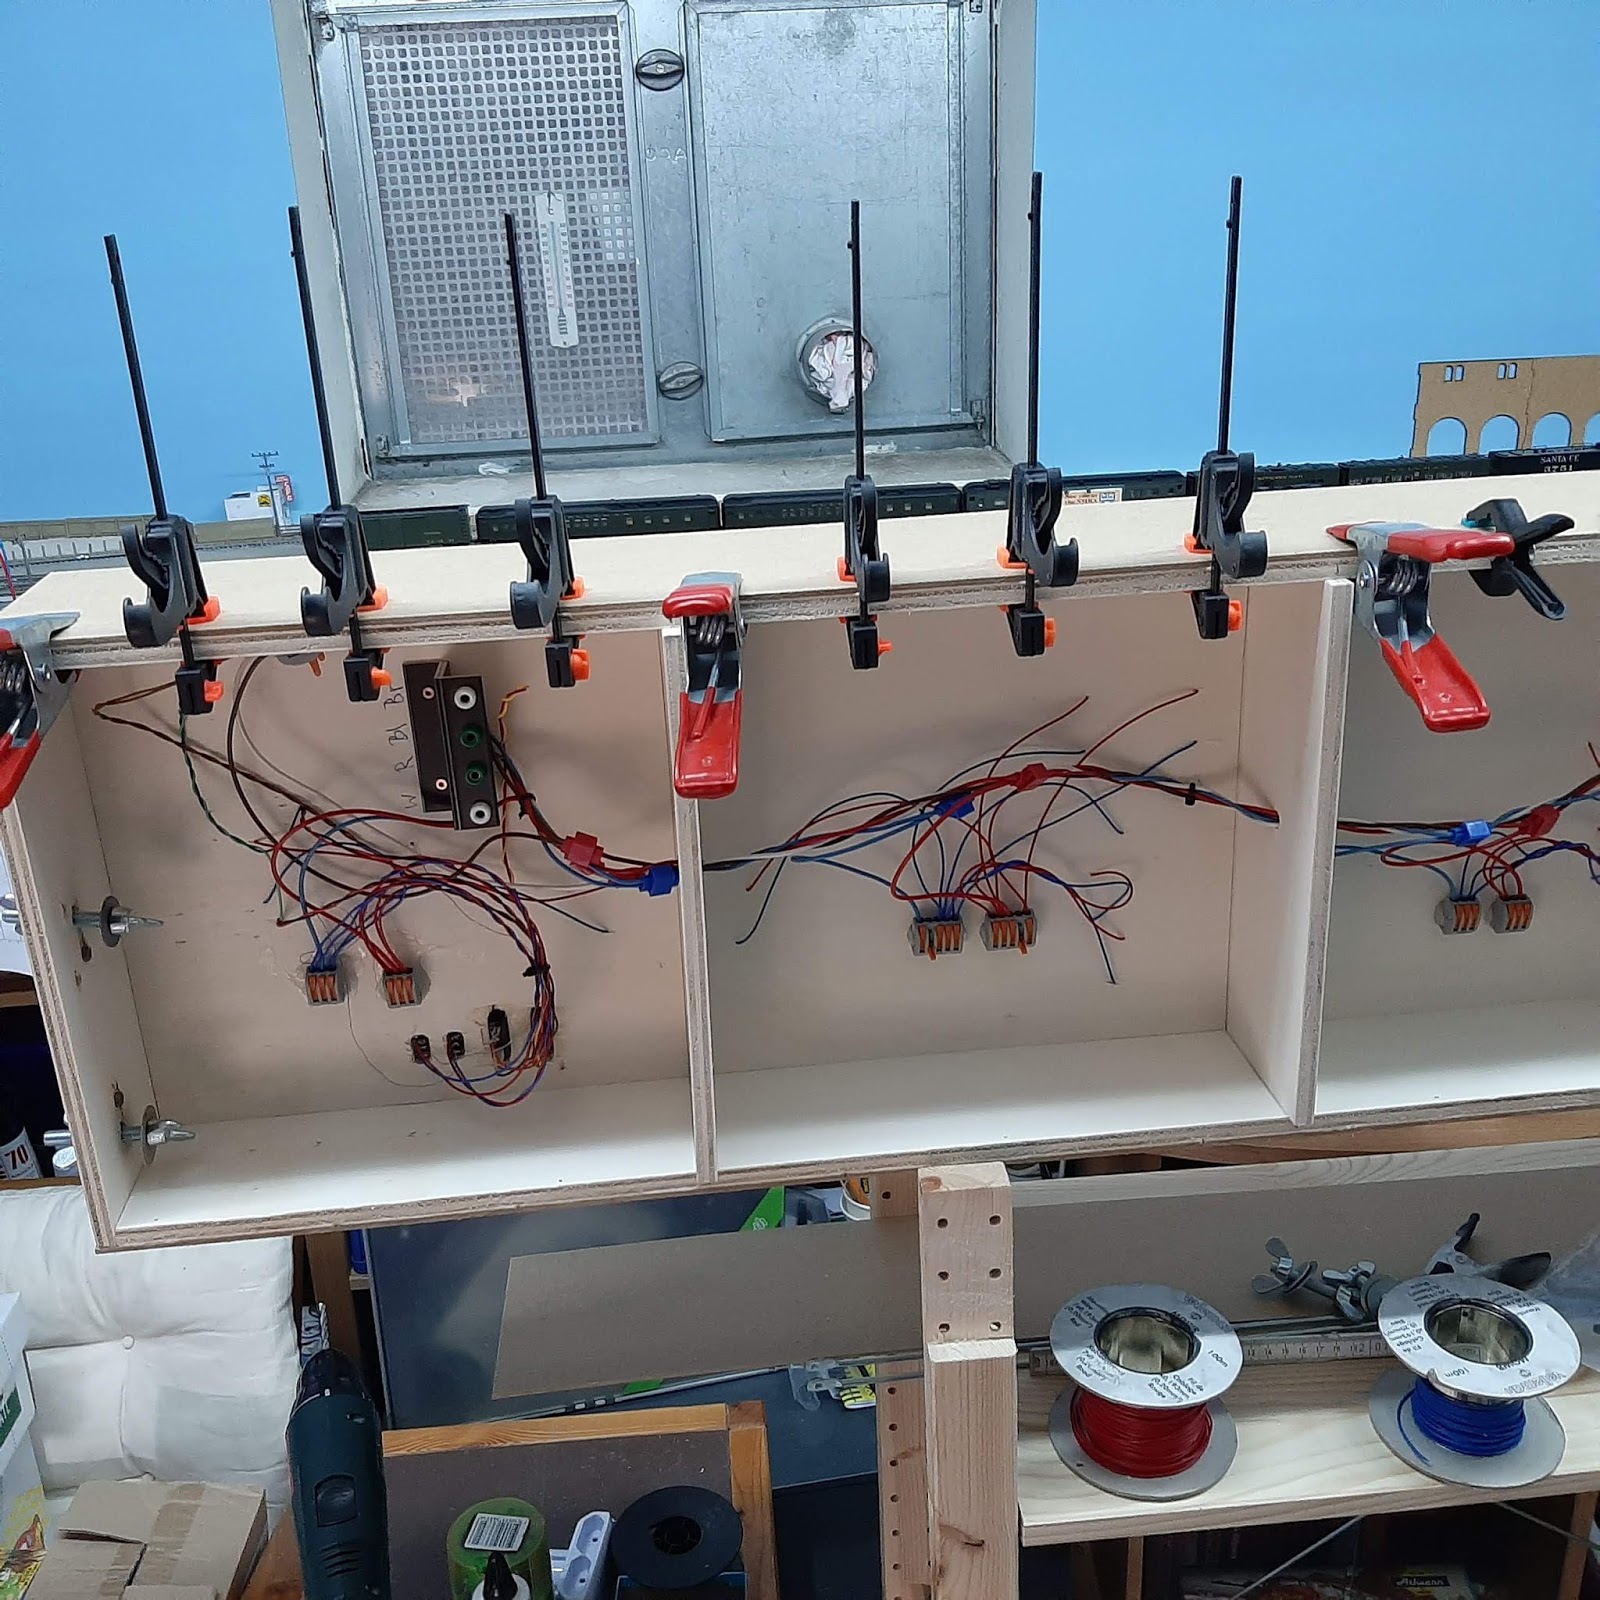


I powered the turnouts with surface mounted motors for easy maintenance. Two power the motors I used PECO switches. To install the switches, I had to drill and cut appropriate holes into the baseboard.


 After the wiring was finished, I attached 3mm MDF boards to the sides of the segments. These extend 3cm above the baseboard and prevent rolling stock from falling off the sides. The yard will not be scenicked and its only purpose is to store locomotives and rolling stock on and beside the tracks.


The yard sections rest on a 30 cm deep IVAR shelf from IKEA. The shelf boards give me additional storage space for boxes and stuff needed.


When using the yard as an extension to my switching layout, the original cassettes serves as drill track for a locomotive at the end of the yard. To save space, the 3-way turnouts are located at the edge of the segments, so the cassette is very useful here.


To save on set-up time I installed alignment dowels on all of my segments. To allow multiple configurations I copied the location of the dowels on the cassette to the curve as well as the straight yard sections. Now it's possible to set the layout up in a straight line, as a U or inverted C or as an L, depending on the available space at a show.


With continuous running in mind, I chose to use a 20" radius for the curve. This is tight, I know, but with short switchers and freight cars, the tight radius curve will be no problem.

The new configuration was tested at two shows in December 2019. Some minor issues were corrected and some improvements made and now the layout is ready for the next upcoming shows in 2020 and beyond.


I spent the days between Christmas Dinner and New Year's Eve Dinner to build the third yard segment, which may be inserted in the center of the yard. This, of course in anticipation of the run-around situation for the next show layout.


To avoid tearing up the tracks at the edges of the segments, I always solder the rails to screw heads and cut them later. This makes for a perfect alignment and together with the alignment dowels on the segments I've never had derailment problems.

Stay tuned for more updates.


Tuesday, October 8, 2019

Building a switching layout (Part 8) Finished

Below is a stitched together image of the switching layout.


The two pictures below show the layout at its first appearance at the US-Convention in Rodgau/Germany back in 2017.


Below are some of the scenes I created. There are still some details to be added.


I am looking forward to meet you at one of the shows in Europe. 

Building a switching layout (Part 7) Billboards


We see billboards and outdoor advertisements all around us, everywhere we go. In modeling they not only add a sense of reality but also help to set the timeframe or era we are trying to reproduce.

My switching layout is set in the late 1960's to early 1970's. This was a time of great change. The youth stood up to demonstrate against the establishement, the Vietnam war was in everybody's mouth and muscle cars still roamed the streets. This was also reflected in the advertisements of the time.


In the picture above, I modeled an interstate exit over the rail yard with appropriate highway signs but also two billboards which perfectly reflect the mood of these times. Love and Peace on the left and a more conservative ad reminding us to send our next letter to our boys in Vietnam.

A quick search on the internet will bring up hundreds of period pictures of billboards and advertisements. I only selected signs without specific dates. These are most common on automobile ads, as they usually praise a car of a certain model year, like 1968 Ford Mustang. I did not model one specific year, but wanted to give a feel of this era. 


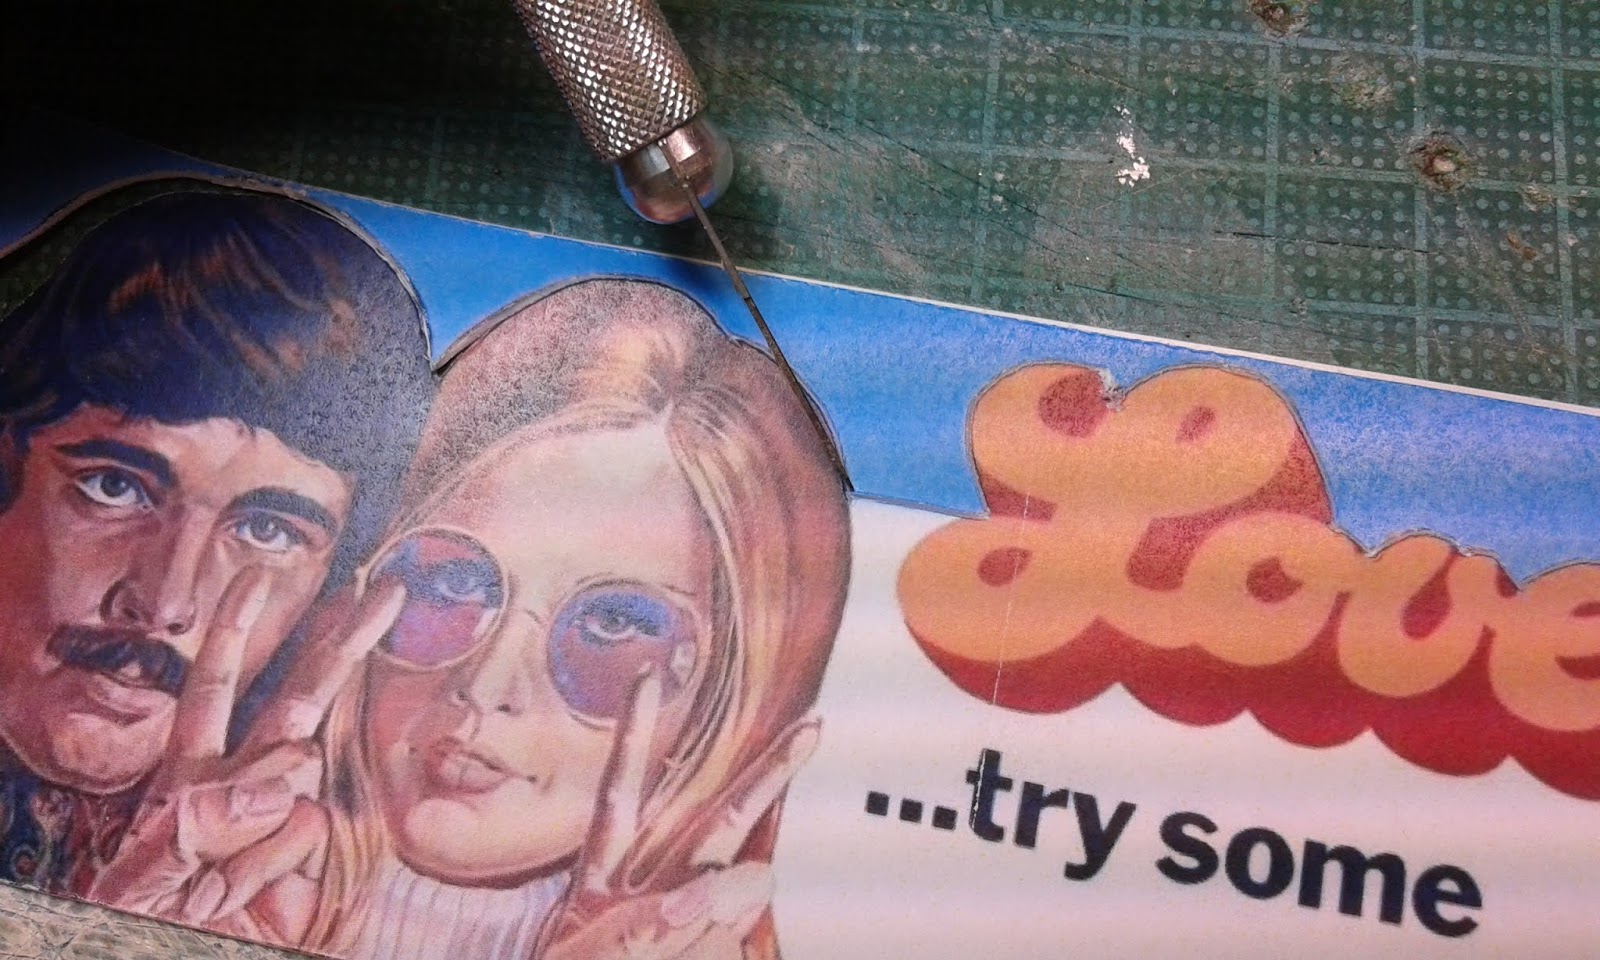
The Love...try some sign immediately caught my eye, because it reflects the feeling of the time, Make Love, Not War, with a little hippie touch. Also it extends over the boarders of the billboard, which gives the sign more visibility.


 I downloaded the picture and resized it accordingly. Then I printed it out and glued the sign to a piece of .015" plain styrene. Using a fresh #11 blade in my hobby knife, I cut the overhanging contours out.


The sign looks some kind of special now


Then I added some braces to the back of the sign and a walkway as well.


 I mounted the billboard to a styrene tube and installed it on the layout next to the highway bridge.


Seven-Up at the time had many psychedelic looking advertisements. This one seems to be inspired by the Beatles' Yellow Submarine.


I used a wooden billboard frame from Blair Line to mount the 7-Up Poster and attached it to the side of the distributing facility.

Another special billboard I absolutely wanted on my layout - the Marlboro Man.


I mounted the image in the same way as the Love billboard above. Plain styrene sheet, reinforced with styrene C-channels. I don't claim to have done it prototypically because it will not be seen from the back side.


I found that a wooden dowel fits exactly into the styrene tube. I used it to stiffen the tube while mounted on the layout. If needed, I could also remove the billboard. I did the same with the Love billboard.


Here the sign is installed on the other side of the highway bridge.

Although advertisements for cigarettes are more and more banned from our daily life, back in the 1960/70's they were a predominant sight. Famous actors and stars gave us the impression, that we only needed to smoke the same cigarettes to become as famous as they are.


I mounted the large Salem brand advertisement to the side of a small business next to the aisle on the layout.


Another slogan seen all over the place in the early 1970's was issued by John Lennon and Yoko Ono, saying "War is over, if you want it!". Again, I wanted this one on the layout as a reference to the opposing opinions about the Vietnam War in those days.

Another sign I like, is the Dollar Rent-a-car key sign, next to the building.

Billboards on building roofs were and are still very common. There are limitless possibilities to add character to any layout, using period billboards and signs.

Wednesday, April 5, 2017

Building a switching layout (Part 6) Ballasting and ground cover

Ballasting

I ballasted the track with a grey blend mix from Woodland Scenics.


After the ballast is leveled between the ties, I wet the whole area with wet water from a spray bottle. I use distilled water with a few drops of Isopropy Alcohol added. You could also use a drop of dishwashing solution, but it tends to bubble if you add too much.


With a pipette or eye dropper, I drizzle the scenic glue onto the wetted ballast. I usually use matte medium or carpenters' white glue thinned 1:7 with distilled water and again a few drops of Isopropy Alcohol added to make the glue creep between the ballast.


Extra care should be taken on turnouts. After the glue has dried, the points and closure rails may stick to the ties. Also the switch tie may have bonded to the subroadbed.


To avoid glueing the moving parts of a turnout, I simply don't add glue to the switch tie area. If the rails and ties are weathered or painted, this isn't visible right away, especially if the turnouts are farther back. The crossing above will be located behind a building, so it cannot be seen anyway.


While the glue sets, I add fine turf and static grass to the ballasted area. This of course only on indutry trackage or rarely used tracks.

Asphalt or tarmac

For some time now, I use 3mm cork sheets under my tracks or to model parking or loading areas and roads. It lifts these spaces above the surrounding subroadbed.


I painted these areas with Heki Asphalt Paint. This paint is thick enough, so that normally one coat is sufficiant.


Another advantage of cork is, that you may scratch out small pieces to represent potholes.


The area between the rails is filled with wall compound. Before it hardened, I scribed the flangeways free along the rails.

Potholes and asphalted cobblestones

As already mentioned before, potholes are easily modeled using cork sheet for roadbed.


On my loading area between the tracks, I wanted to represent a special kind of road damage. Many loading areas and street used to be laid out with cobblestones, which were simply covered with asphalt, to achieve a smoother surface. Unfortunately, heavy traffic and the weather caused the asphalt to break occasionally. These broken asphalt bits were torn away over time and exposed the cobblestones underneath, causing a rather bumpy road surface.


To do this I randomly cut out some more or less round shapes from a Vollmer cobblestone pattern styrene sheet using a pair of scissors. Then I placed the pieces on the cork and traced the outlines with a black permanent marker.


With a chisel blade, I carved the cork out following the outlines.


The styrene sheet is approximately 1 mm thick, so it gives a nice recess.


I glued the cobbelstone pieces down into the recess and painted them a light brown/kakhi color.


Then I filled the edges with wall compound and touched up the paint.


Now the loading area looks a bit worn out from the heavy traffic.

Next step will be weathering and detailing.

Stay tuned!